Window Installation Guide (8 Tips You Need In 2026)
9 Minute Read

Posted 7.20.26

New windows are one of the highest-impact home upgrades available, improving comfort, reducing energy costs, and changing the appearance of a home from both inside and out. Window installation done correctly lasts 20 to 30 years without issues. Done poorly, it causes air leaks, water infiltration, voided warranties, and performance that falls well short of what the product is capable of delivering. Before any windows go in, windows and doors services from our team give Whittier homeowners a clear picture of what proper installation involves. This guide covers eight tips that determine whether a window installation delivers everything it should.
Here is what this guide covers:
- Why installation quality matters as much as window quality
- Eight tips covering measurement, product selection, flashing, sealing, and contractor vetting
- The difference between replacement windows and new construction windows
- Energy efficiency considerations specific to Southern California
- What to expect on installation day and how to evaluate the finished work
Why Installation Quality Determines Window Performance

A high-quality window installed incorrectly performs no better than a mid-grade product. The entire process from flashing to air sealing determines whether the window manages water correctly and achieves its rated thermal performance.
According to the U.S. Environmental Protection Agency, ENERGY STAR certified windows can save homeowners an average of 20 percent on annual heating and cooling costs when replacing single-pane clear glass windows, but those savings depend entirely on correct installation that eliminates air leakage around the frame. A window installed without proper air sealing loses most of its energy performance regardless of its rating.
We’re proud to serve homeowners in Whittier, CA, and surrounding communities with windows and doors services and more.
8 Window Installation Tips for 2026
Getting a window installation right comes down to preparation, product selection, and correct installation sequence.
1. Measure the Rough Opening Before Selecting a Window
Window sizing starts with the rough opening, not the finished window dimensions. The rough opening is the framed hole in the wall into which the window unit is placed. Replacement windows are sized to fit within the existing frame, while new construction windows are sized to the rough opening. Measuring incorrectly at this stage leads to ordering windows that do not fit, which delays the project and often incurs restocking fees.
Measure width at three points and height at three points; use the smallest measurement in each direction. Most manufacturers require the rough opening to be at least half an inch larger than the window unit to allow for shimming and leveling.
- Width measurement: Measure at the top, middle, and bottom of the opening; use the smallest of the three
- Height measurement: Measure at the left, center, and right; use the smallest of the three
- Replacement vs. new construction: Replacement windows fit within the existing frame; new construction windows fill the rough opening and require accessible framing
2. Understand the Difference Between Replacement and New Construction Windows
These two window types are not interchangeable. Replacement windows slide into an existing frame without disturbing the surrounding wall or siding, and are the right choice when the existing frame is structurally sound. New construction windows have a nailing flange that attaches directly to rough framing and are required during a remodel where framing is exposed, or when the existing frame is damaged.
- Replacement windows: Best when the existing frame is sound; faster installation with less wall disruption; slightly reduced glass area versus the original opening
- New construction windows: Required when framing is exposed or the existing frame is compromised; provides maximum glass area and a full weather barrier integration
- Red flag: A contractor who proposes new construction windows in a retrofit situation without explaining why is either unfamiliar with the project type or adding unnecessary scope
3. Inspect the Frame and Surrounding Structure Before Installation Begins

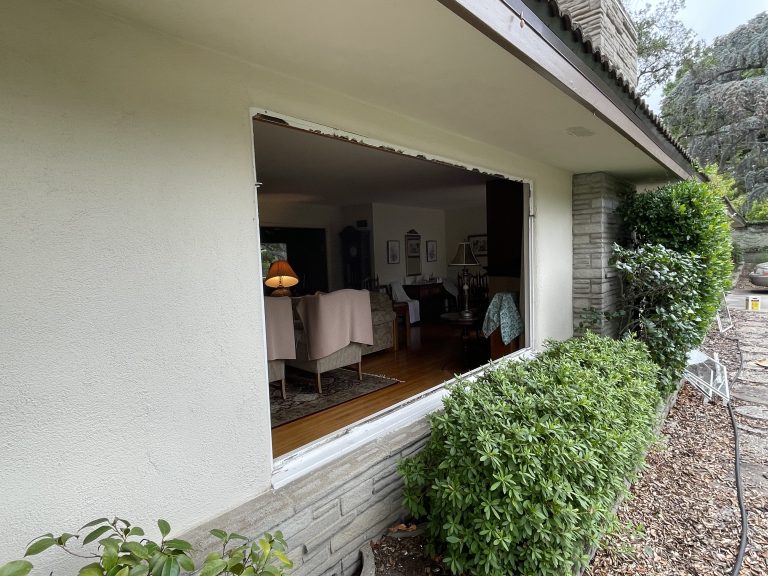
Once the old window is removed, inspect the frame, sill, and surrounding framing. Rot, water damage, or insect damage must be repaired before the new window goes in. In Southern California, older homes in Whittier frequently have wood sills that have experienced moisture intrusion over decades. Do not assume the structure is sound without visual confirmation.
- What to look for: Soft or discolored wood at the sill, visible mold, gaps in the framing, or previous caulk covering structural damage rather than repairing it
- Repair before installation: Any rotted or compromised framing must be replaced before the new window is set; installing over damage voids most manufacturer warranties
- Documentation: A contractor who photographs the opening condition before and after repair is operating with the transparency that protects both parties
4. Flash the Opening Correctly Before the Window Goes In
Flashing is the most commonly skipped step in residential window installation. It directs water that gets behind the cladding out of the wall assembly rather than into the framing. Self-adhering flashing tape, also called house wrap tape, is applied sill first, then sides, then head. Getting the sequence wrong creates laps that channel water inward rather than outward.
- Sill pan first: A sill pan at the base of the window opening is the first line of defense against water infiltration; it extends past the corners to create end dams
- Sides second: Side flashing laps over the sill flashing, not under it, so water drains onto and off the sill rather than behind it
- Head last: A drip cap laps over the top of the window frame and integrates with the housewrap above the opening
5. Shim, Level, and Square Before Fastening
A window installed out of level or square will not operate smoothly: casements will not latch, double-hung sashes will drift, and sliding windows will bind. Shims at the sill corners and sides bring the window into alignment before any fasteners are driven.
- Level check: Use a level on the sill and both jambs before driving any fasteners; the sill must be level for correct drainage
- Square check: Measure diagonally from corner to corner in both directions; equal diagonal measurements confirm a square installation
- Minor adjustments: Make minor adjustments to shim placement before driving fasteners; double check level, plumb, and square after each adjustment
- Fastener placement: Follow the manufacturer’s fastener schedule exactly; under-fastening reduces wind resistance
6. Insulate and Air Seal Around the Frame
After shimming and fastening, the gap between the window frame and rough framing must be insulated and air sealed before interior trim goes on. This determines whether the window’s rated thermal performance is achieved. Use low-expansion spray foam only; high-expansion foam generates pressure that bows the frame and causes operational problems.
- Foam choice: Low-expansion window and door foam only; high-expansion foam generates enough pressure to distort the frame and cause operational problems
- Gap coverage: Fill the full depth on all four sides; use backer rod behind larger gaps before applying foam, ensuring complete coverage before trim goes on
- Exterior caulk: Apply paintable exterior caulk at the perimeter of the window trim after installation; this is a secondary weather seal, not the primary one
7. Verify ENERGY STAR Certification for the Climate Zone
Not all ENERGY STAR certified windows suit all climates. Southern California falls in the Southern climate zone, which requires windows designed to minimize solar heat gain. Confirm that windows specified for your project carry ENERGY STAR certification for the Southern climate zone before ordering. Choosing the right certified product is how you save money on energy costs long-term, not just at purchase.
- U-factor: Measures how well the window insulates; lower is better; ENERGY STAR Southern zone requirement is 0.40 or below
- Solar Heat Gain Coefficient (SHGC): Measures how much solar heat the window transmits; lower is better in hot climates; ENERGY STAR Southern zone requires 0.25 or below
- Certification confirmation: Request the NFRC label data for any window being specified before signing the contract; this label confirms both the U-factor and SHGC
8. Vet the Installer as Carefully as the Window Product
The best window product will underperform when installed by an inexperienced crew. In California, window installers on permitted projects must hold an active CSLB license. Request references from recent window installation projects specifically and ask how the contractor handles rot discovered after removal. A contractor who cannot answer clearly is not ready for a project that lasts 20 to 30 years.
- License verification: Active CSLB license at cslb.ca.gov; confirm classification covers window installation
- Permit responsibility: The contractor pulls the permit; any suggestion that permits are optional for window installation in California is a red flag
- Workmanship warranty: A minimum two-year workmanship warranty in writing is the baseline; established contractors offer five years or more
Common FAQs About Window Installation

These are the questions homeowners most commonly ask before scheduling a window installation.
How long does window installation take?
A professional crew installs one window every 30 to 45 minutes under normal conditions. A whole-home replacement of 10 to 15 windows is typically completed in a single day, with larger or more complex projects taking longer.
Do I need permits for window installation in California?
Like-for-like replacement windows in the same opening typically do not require a permit in most California jurisdictions. Projects that change opening size, add new windows, or involve structural changes require one. Confirm with your contractor before work begins as requirements vary by city.
What is the best window material for Southern California?
Vinyl is the most practical choice for most Southern California homes: it does not rot, does not require painting, handles UV exposure well, and is available across the full ENERGY STAR performance range. Fiberglass is the premium alternative with better dimensional stability. Wood-clad windows suit homes where exterior wood character matters but require more maintenance.
How do I know if my windows need replacing versus repairing?
Windows that fog between panes have failed seals and require glass unit replacement. Rotted frames, broken hardware, or significantly out-of-square frames benefit more from replacement than repair. Single-pane windows in Southern California almost always warrant replacement with a double-pane low-e unit on energy efficiency grounds alone.
C&M Home Revival Installs Windows That Perform
A window that is installed correctly from day one requires nothing more than basic cleaning for the next two to three decades. At C&M Home Revival, we help Whittier homeowners select the right windows for their climate zone, pull permits, handle any structural issues discovered during removal, and install with the flashing and air sealing technique that delivers the energy performance the product promises.
Schedule your free window estimate and find out what properly installed windows actually feel like from inside the home.